| |
Multi-Dimensional Acquisition
Table of Contents:
1. Getting ready for multi-dimensional acquisition
2. Setting the parameters for acquisition
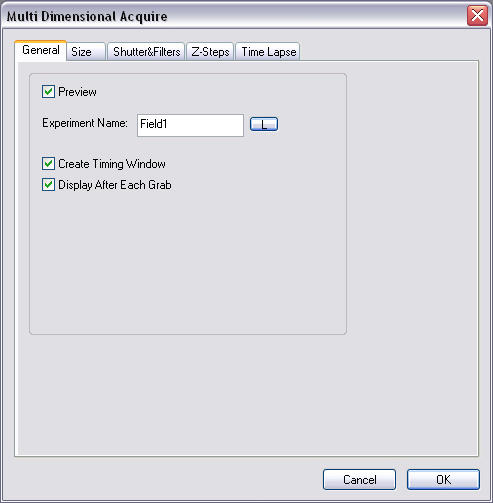
2.1 General
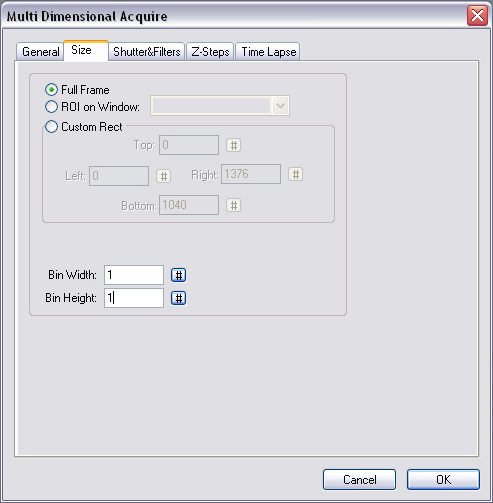
2.2 Size
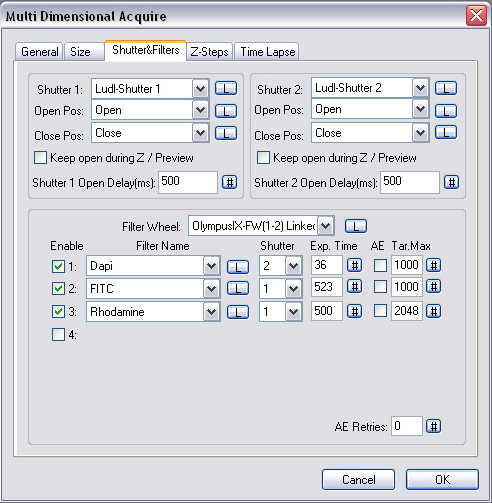
2.3 Shutters and Filters
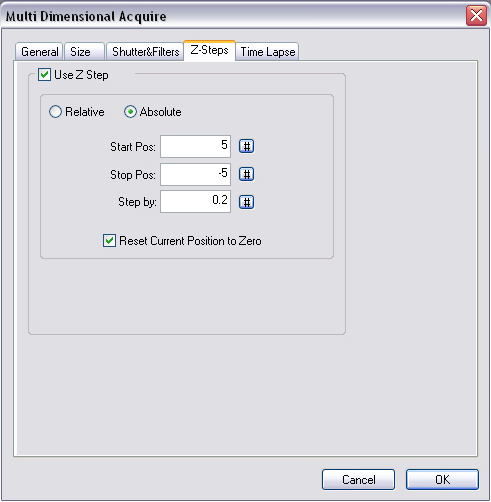
2.4 Z-Steps
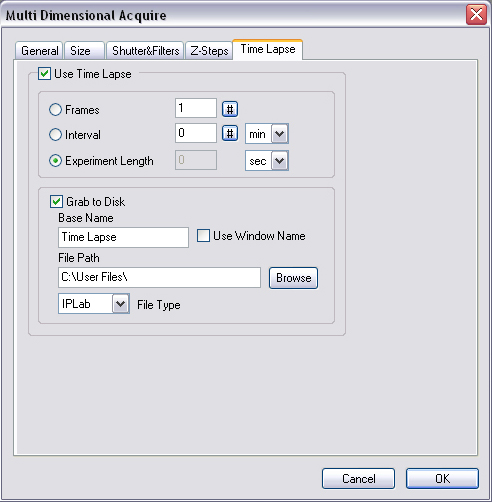
2.5 Time Lapse
4. Click “OK” and start your experiment!
Multi-Dimensional Acquisition using IPlab on Digital Station #2
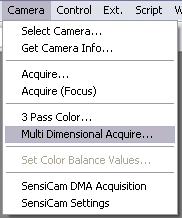
1. Getting ready for multi-dimensional acquisition:
2. Setting the parameters for acquisition:
- Preview - Select this to preview the sample before acquisition.
- Experiment Name - Set a name for the experiment to be saved.
- Create Timing Window - This will open a table with the capture time of each image recorded to be saved (may be applicable for time lapse experiments).
- Display After Each Grab - check this to see image after it is collected
- Full Frame, ROI or Custom Rect (most users will select “Full Frame”).
- Bin Width / Height - Set as you would to capture single images (Use “#” not “V”).
- Shutters 1 and 2
- Shutter X - Select a shutter (Ludl-shutter 1 for fluorescence, 2 for transmitted light.)
- Open Pos - Open
- Close Pos - Close
- Keep open during Z/Preview - Select
**If you want to capture a z-series of both phase and flourescence, DO NOT SELECT THIS OPTION**- Shutter 1 Open Delay(ms) - At least 500 (#) ms if switching filters.
- Filter Wheel: Select OlympusIX-FW(1-2)…
- Enable - Select this to choose filter from the list
- Shutter - Select shutter
- Exp. Time - Set exposure time.
- AE - Don’t use AE
- Use Z Step - Select this
- Absolute - Select Absolute
- Start Pos - How far up?
- Stop Pos - How far down? (-)
- Step by - Choose step size (um)
- Reset Current - Select this
- Use Time Lapse - Select this for time lapse imaging
- Set Time Lapse experiment parameters
- Set the file path for saving your files (zseries, time lapse)
- Click 'OK'
***This software currently saves the images with file names based upon the filter. If you take a FITC fluorescence image and then take a transmitted image with the FITC filter in place you will overwrite the data!!
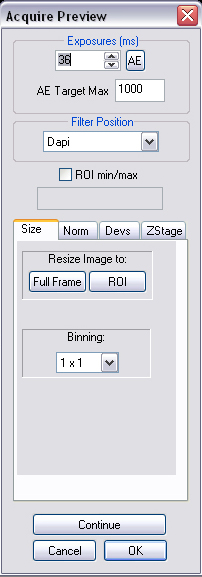
Like the settings window this also has tabs allowing users to change settings. We’ll only cover two of these tabs which are the most common used.
This allows you to change the size of the image collected.
- Click "Continue"
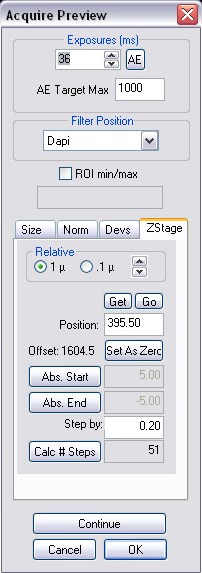
- Use the focus knob to move to one end of the sample
- Click "Get" to get the current position
- Click "Abs. Start" / "Abs. End"
- Move to the other end of the sample
- Repeat the last two steps (Get & Abs. Start/End)
- Step by - Another opportunity to change step size
- Calc # Steps - click to see the total number of z slices that will be acquired
4. Click “OK” to start your experiment!
edited by Dustin Grzesik 10/21/2004
updated by Rosana Leonard 03/09/05