
| |
Methods for merging images with Photoshop.
To merge grayscale images to make color images with Photoshop, you need to understand two basic concepts. One is Channels. The other is Layers.
 Image made by a 2D matrix of pixels. Each square represents one pixel. |
Channels:
Any digital image is comprised of a two dimensional array of pixels (or voxels).
In a grayscale image there is one 2D matrix (also known as one color plane or one channel).
In a color image there are three 2D matrices stacked on top of each other. One represents each color red, green, and blue. These are what we call channels and is fully explained in an article from PEI magazine.
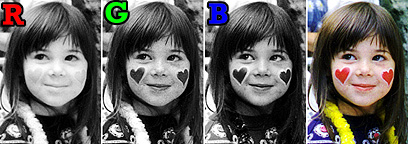
Color separation into three channels of the image above right:
 red |
 green |
 blue |
Color separation into three channels and the merged image in a standard photograph:
 |
All channels can be processed at once or each channel may be displayed or operated on
by itself.
From the Window-->Palettes-->Show Channels menu, you may display these:
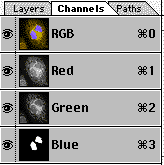 In RGB mode. All channels are shown (all eyes are turned on) and all channels are being operated on (all channels are grayed in). |
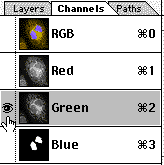 Only the green channel is shown (the eye is on only in the green channel) and only the green channel is being operated on (only the green channel is grayed in). |
 All channels are shown (the eyes are turned on) but only the green channel is being operated on (the channel is grayed in). |
Instructions for merging:
Let's say you have two grayscale images that you want to merge as red and green.
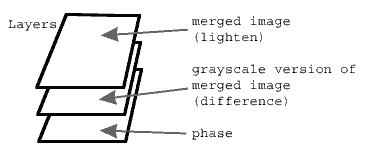
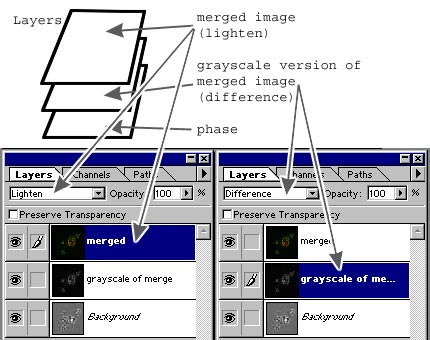
Layers:
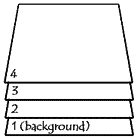 In the example
at the left, there are four images stacked on top of each other. These are layers.
In the example
at the left, there are four images stacked on top of each other. These are layers.
The main purpose for layers is to nondestructively paste objects on top of each other.
For instance, you may paste text, arrows, or scalebars over your images in a separate layer. The original microscope images are preserved and they are annotated in a completely malleable manner. From the Windows menu, you can show the layers pallette. You can turn layers on and off by clicking on the eye. You can draw or paste into a layer by clicking on the layer.
In RGB mode. All channels are shown (all eyes are turned on) and all channels are being operated on (all channels are grayed in). |
Only the green channel is shown (the eye is on only in the green channel) and only the green channel is being operated on (only the green channel is grayed in). |
All channels are shown (the eyes are turned on) but only the green channel is being operated on (the channel is grayed in). |
Normally, each layer is dispayed as 100% opaque in the Normal mode. As such, you will only see the topmost layer; the other layers will be hidden from view. This is analogous to collage with paper. Cut out objects from paper and lay them on top of each other. Layers in Photoshop operate in the same way.
However, in Photoshop layers may have mathematical properties other than opaque. For instance, a layer may be shown only when its pixels are brighter than those in the image below it. Or the difference between the layer and the images below it may be calculated and displayed.
Layers from back to front.
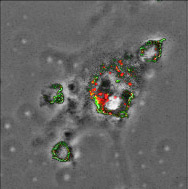
And here's how to stack color images on transmitted light images.
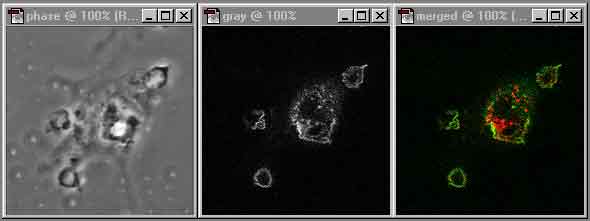
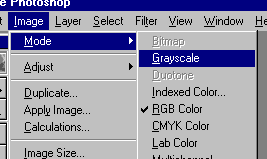
To get the middle grayscale image, make a copy of the color image and change modes.
Paste the three images together. Simply pasting the fluorescent images directly over the phase contrast image will make the layers.
Page last revised 4 Jan 2002 by mc