PerkinElmer
Spinning Disk Confocal
(purchased 12/24/2004)
Table
of contents:
|
Overview of the system:
| Standard configuration (custom configurations
may be available on request) |
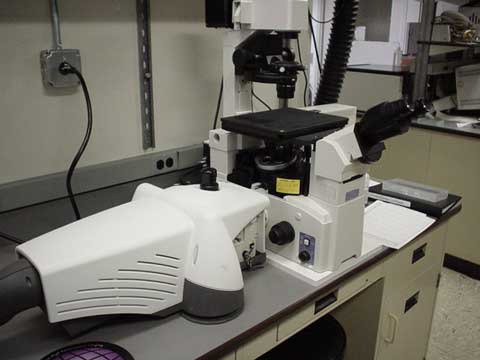
| Nikon Eclipse microscope stand |
| 100x oil immersion objective (Phase3) |
| Fluorescent filters for Dapi,
FITC, Rhodamine |
| Phase contrast and brightfield |
| PerkinElmer spinning disk confocal modular scanhead |
| Ultraview image acquisition software |
| DVD+R, CDRW, Firewire and USB ports for data storage to
external media |
| Other AIF supported software: ImageJ; |
Instructions
for the PerkinElmer spinning disk confocal:
The Startup procedures:
-
Turn on the mercury arc lamp (The power strip is to the
right of the microscope). THE Hg LAMP MUST BE TURNED ON
BEFORE ALL OTHER EQUIPMENT AND OFF LAST.
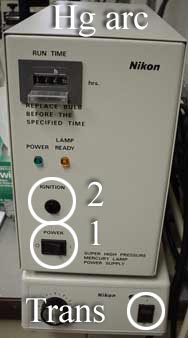
- Turn on the transmitted light source (note that there is a redundant switch-control
on the left side of the microscope body)
- Check to see if the computer is on by wiggling the mouse or hitting the
shift key.*If the computer is off turn it on
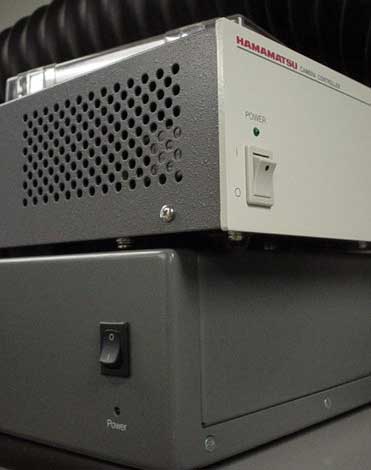
- Turn on camera and Sync controller power supplies located above the microscope
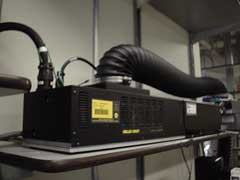
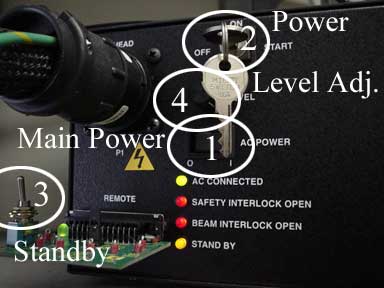
- Turning on the Lasers
- ALWAYS Be sure that the LEVEL knob (4) is turned completely
to the left and the Standby (3) switch is forward before turning on the Laser's
main power switch (2).
- Turn on the AC POWER switch(1) [from 0 to 1]
- Next turn the key from OFF to ON
- Wait for a quiet "click" from the unit before continuing
- Carefully change the Standby switch from OFF to ON- This part
is extremely fragile. Please be gentle with this board/switch.
- Slowly increase (turn clockwise) the LEVEL knob until it stops
- Log into Windows: username=administrator; password=
- Start the Ultraview (TM) software.
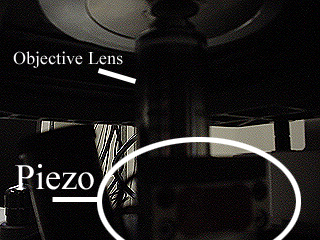
Be aware that the microscope uses a Piezo motor
for fine focusing and Z-series acquisition. This extremely delicate and important
component is located between the objective and the microscope nosepiece. Do
not attempt to adjust this or move this motor!
Viewing your sample by eye
When using Phase-contrast or brightfield it is imperative that one adjusts
the condenser for Kohler Illumination:
- Adjust the transmitted light brightness with the rheostat which is located
on the transmitted light power supply
- Put a small drop of oil on your sample or directly
on the objective lens
- Place your sample with the coverslip facing down and carefully
raise the objective until it touches the oil
- Be sure that the condenser iris diaphragm is completely open
- Close the luminous field diaphragm moderately (top lever in light path)
- Focus the diaphragm image by raising and/or lowering the condenser
- Center the diaphragm image using the two large screws at the front of the
condenser
- Open the luminous field diaphragm until the field of view is entirely illuminated
and the edge of the diaphragm is no longer visible
- The Kohler alignment should be checked and adjusted when one changes either
the sample or objective
- Contrast may be adjusted using condenser diaphragm (The lever
on the left of the 0.55NA condenser)
Phase Contrast
Align the microscope as described above.
- Open the condenser diaphragm completely
- Turn the condenser turret to the Phase setting (ph3)
SHUTDOWN PROPERLY!
- Condenser turret set to BF
- Clean oil off the 100X objective using of lens tissue only. NEVER
USE KIMWIPES!
- Exit the Ultraview software
- Transfer all files to CD, DVD, USB key etc.
- Log out of the windows user account
- Turn off the one power strip which turns off camera and
shutters
- Leave the mercury lamp ON unless it is an evening
or weekend AND no users are signed up for two hours
- Clean up the microscope area including any spilled oil.
Please toss crumpled tissues into the garbage
- Sign out of the logbook
- Remember to take your slides and all of your other stuff
with you
- Publish the data!
Other Links:
Do you have any questions or comments??
|
edited by Dustin Grzesik March 7th, 2005